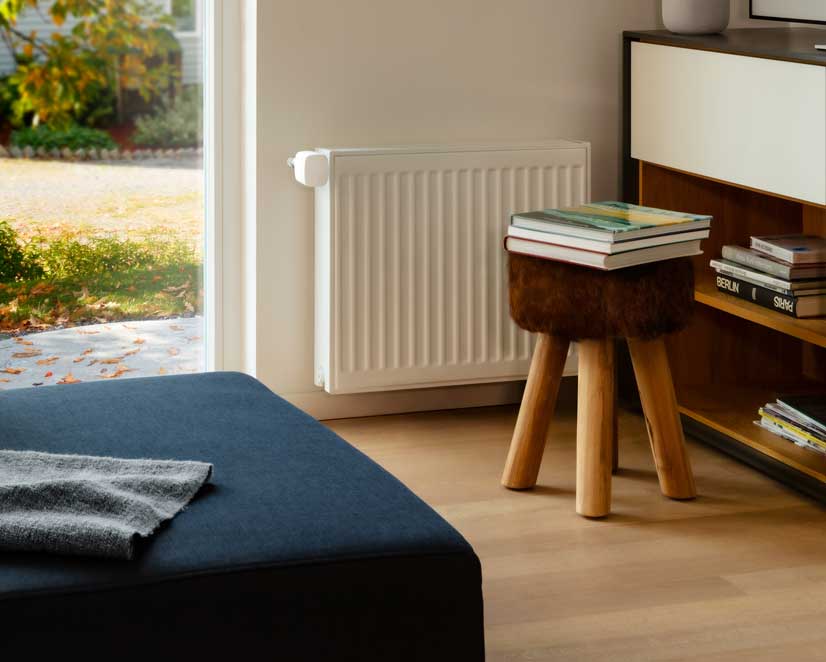
All features of Eve Thermo
The multi award-winning Eve Thermo smart radiator valve is quick and easy to install and set up. And with a bit of fine-tuning, it can unleash all the convenience that connected heating has to offer. Read on for a detailed overview of all the functions Eve Thermo offers.
Now supports Thread
The fourth generation of Eve Thermo, which is available since autumn 2020, now also supports Thread along with Bluetooth. Eve Thermo joins your Thread network automatically, which makes your smart home network more responsive and robust, plus it increases its reach.
Thread accessories don’t need a proprietary bridge to communicate with each other – they simply need a Border Router, which for HomeKit over Thread is HomePod mini or the new Apple TV 4K. Battery-operated Thread accessories, such as Eve Thermo, represent endpoints in your Thread network. Discover all you need to know about HomeKit over Thread here.
You can add Thread support to your latest-generation Eve Thermo simply by updating the accessory’s firmware. Discover if your Eve Thermo can support Thread by visiting evehome.com/identify. Installing the firmware is simply a matter of opening the Eve app and tapping Accessories > [Eve Thermo].
Heating via an app, touch controls and Siri
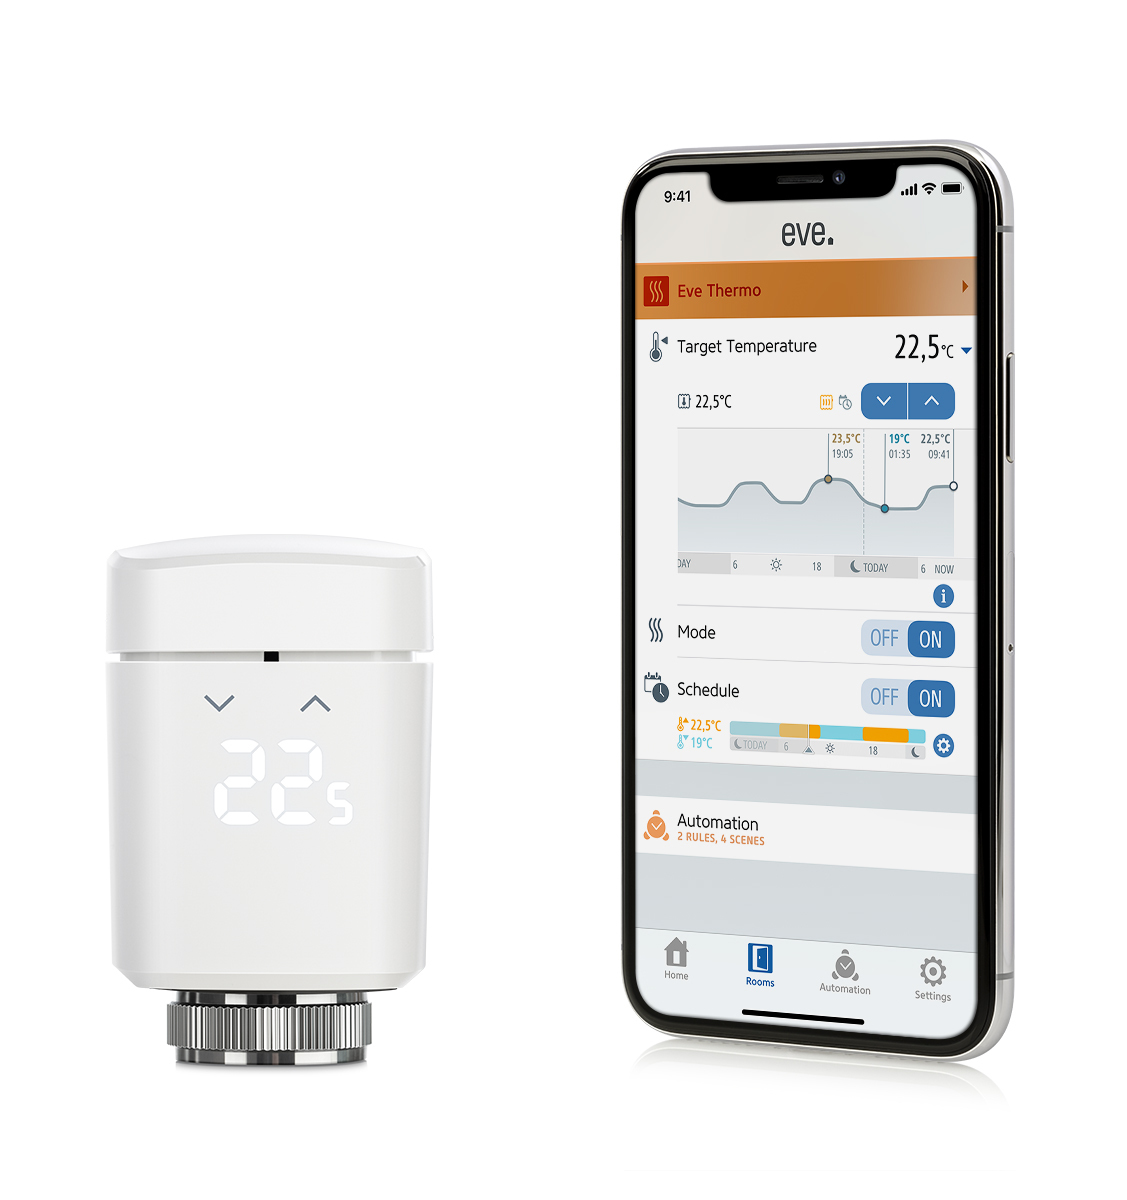
You can control your heating using the Eve and Home apps or simply ask Siri to make your room warmer, set it at a specific temperature or stop heating.
Siri control
- for your whole home: "Hey Siri, set the temperature to 21 degrees."
- room by room: "Hey Siri, set the bathroom to 23 degrees."
- within a zone: "Hey Siri, set the temperature in the first floor to 21 degrees."
- as part of a scene: "Hey Siri, good night!"
Plus, you also enjoy granular control of your heating in increments of 0.5°C on the smart radiator valve itself.
Scheduled heating designed around you
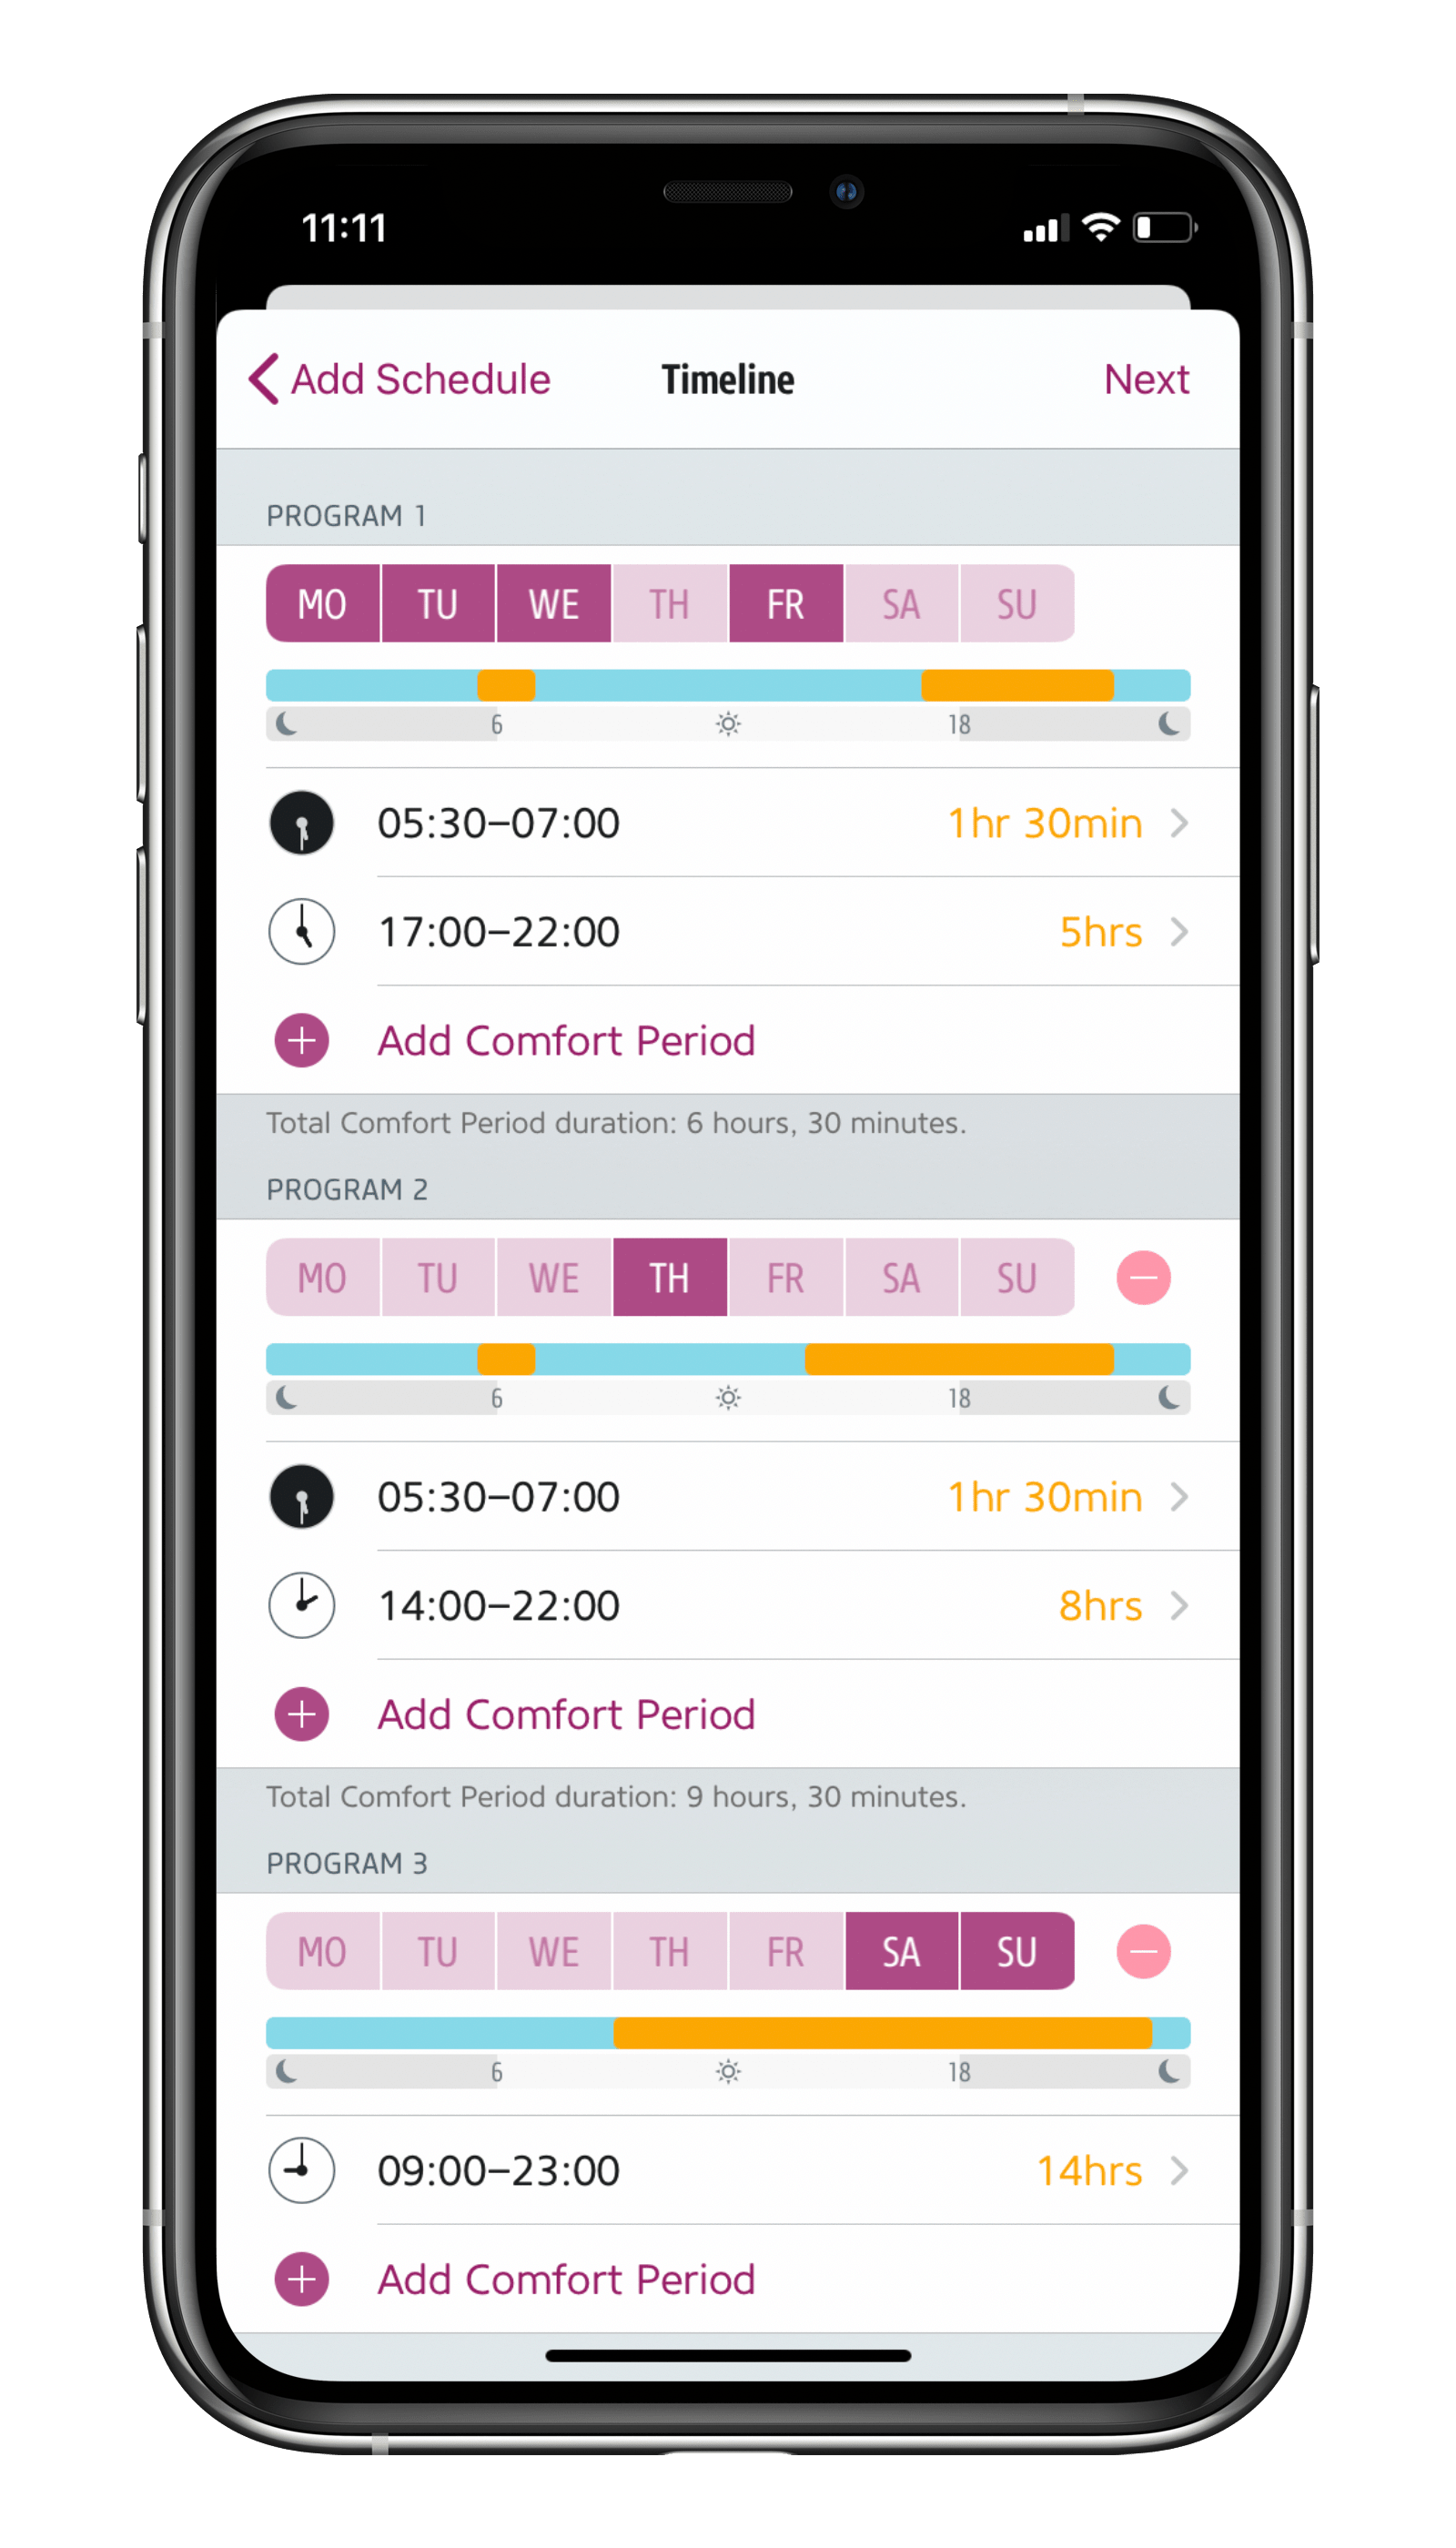
Eve Thermo is built around schedules, which are a really simple and effective way to control your Eve accessories. They’re also a breeze to create using the Eve app – and once you’ve done that, they’re stored automatically on your Eve Thermo so your accessory can set about controlling your heating completely autonomously and all independently of your iPhone and an internet connection.
Each room in your home requires a different temperature, and even that temperature should change to suit the time of day: You want it nice and warm in your bathroom early in the morning, followed by your living room a little later on as well as in the evening. Your bedroom should be set to a constant 17 degrees. Plus, you may also want to take into account that you like to doze under the duvet for that bit longer on Sundays and that the kids arrive home earlier on Thursdays. Sounds complicated, right? Well, using schedules means you’ll get everything fine-tuned to suit your routine in a flash.
You can create a custom schedule for each room in the Eve app, plus you can set the comfort and economy temperature for the room in question. You can then configure the various schedules for workdays and the weekend, or individually for each day – or even for all days. Each schedule offers 3 heating phases such as mornings, afternoons, and evenings.
The "Days Off Calendar" function accesses a calendar chosen by you on your iPhone (such as "Holidays") and ensures that the weekend schedule is run on days which are public holidays – all without you having to lift a single finger.
By the way: Even if a schedule is active, you can still adjust it via the app, Siri or manually on the accessory itself. This setting is then changed with the next scheduled temperature change.
Heating depending on if you’re leaving or arriving at home
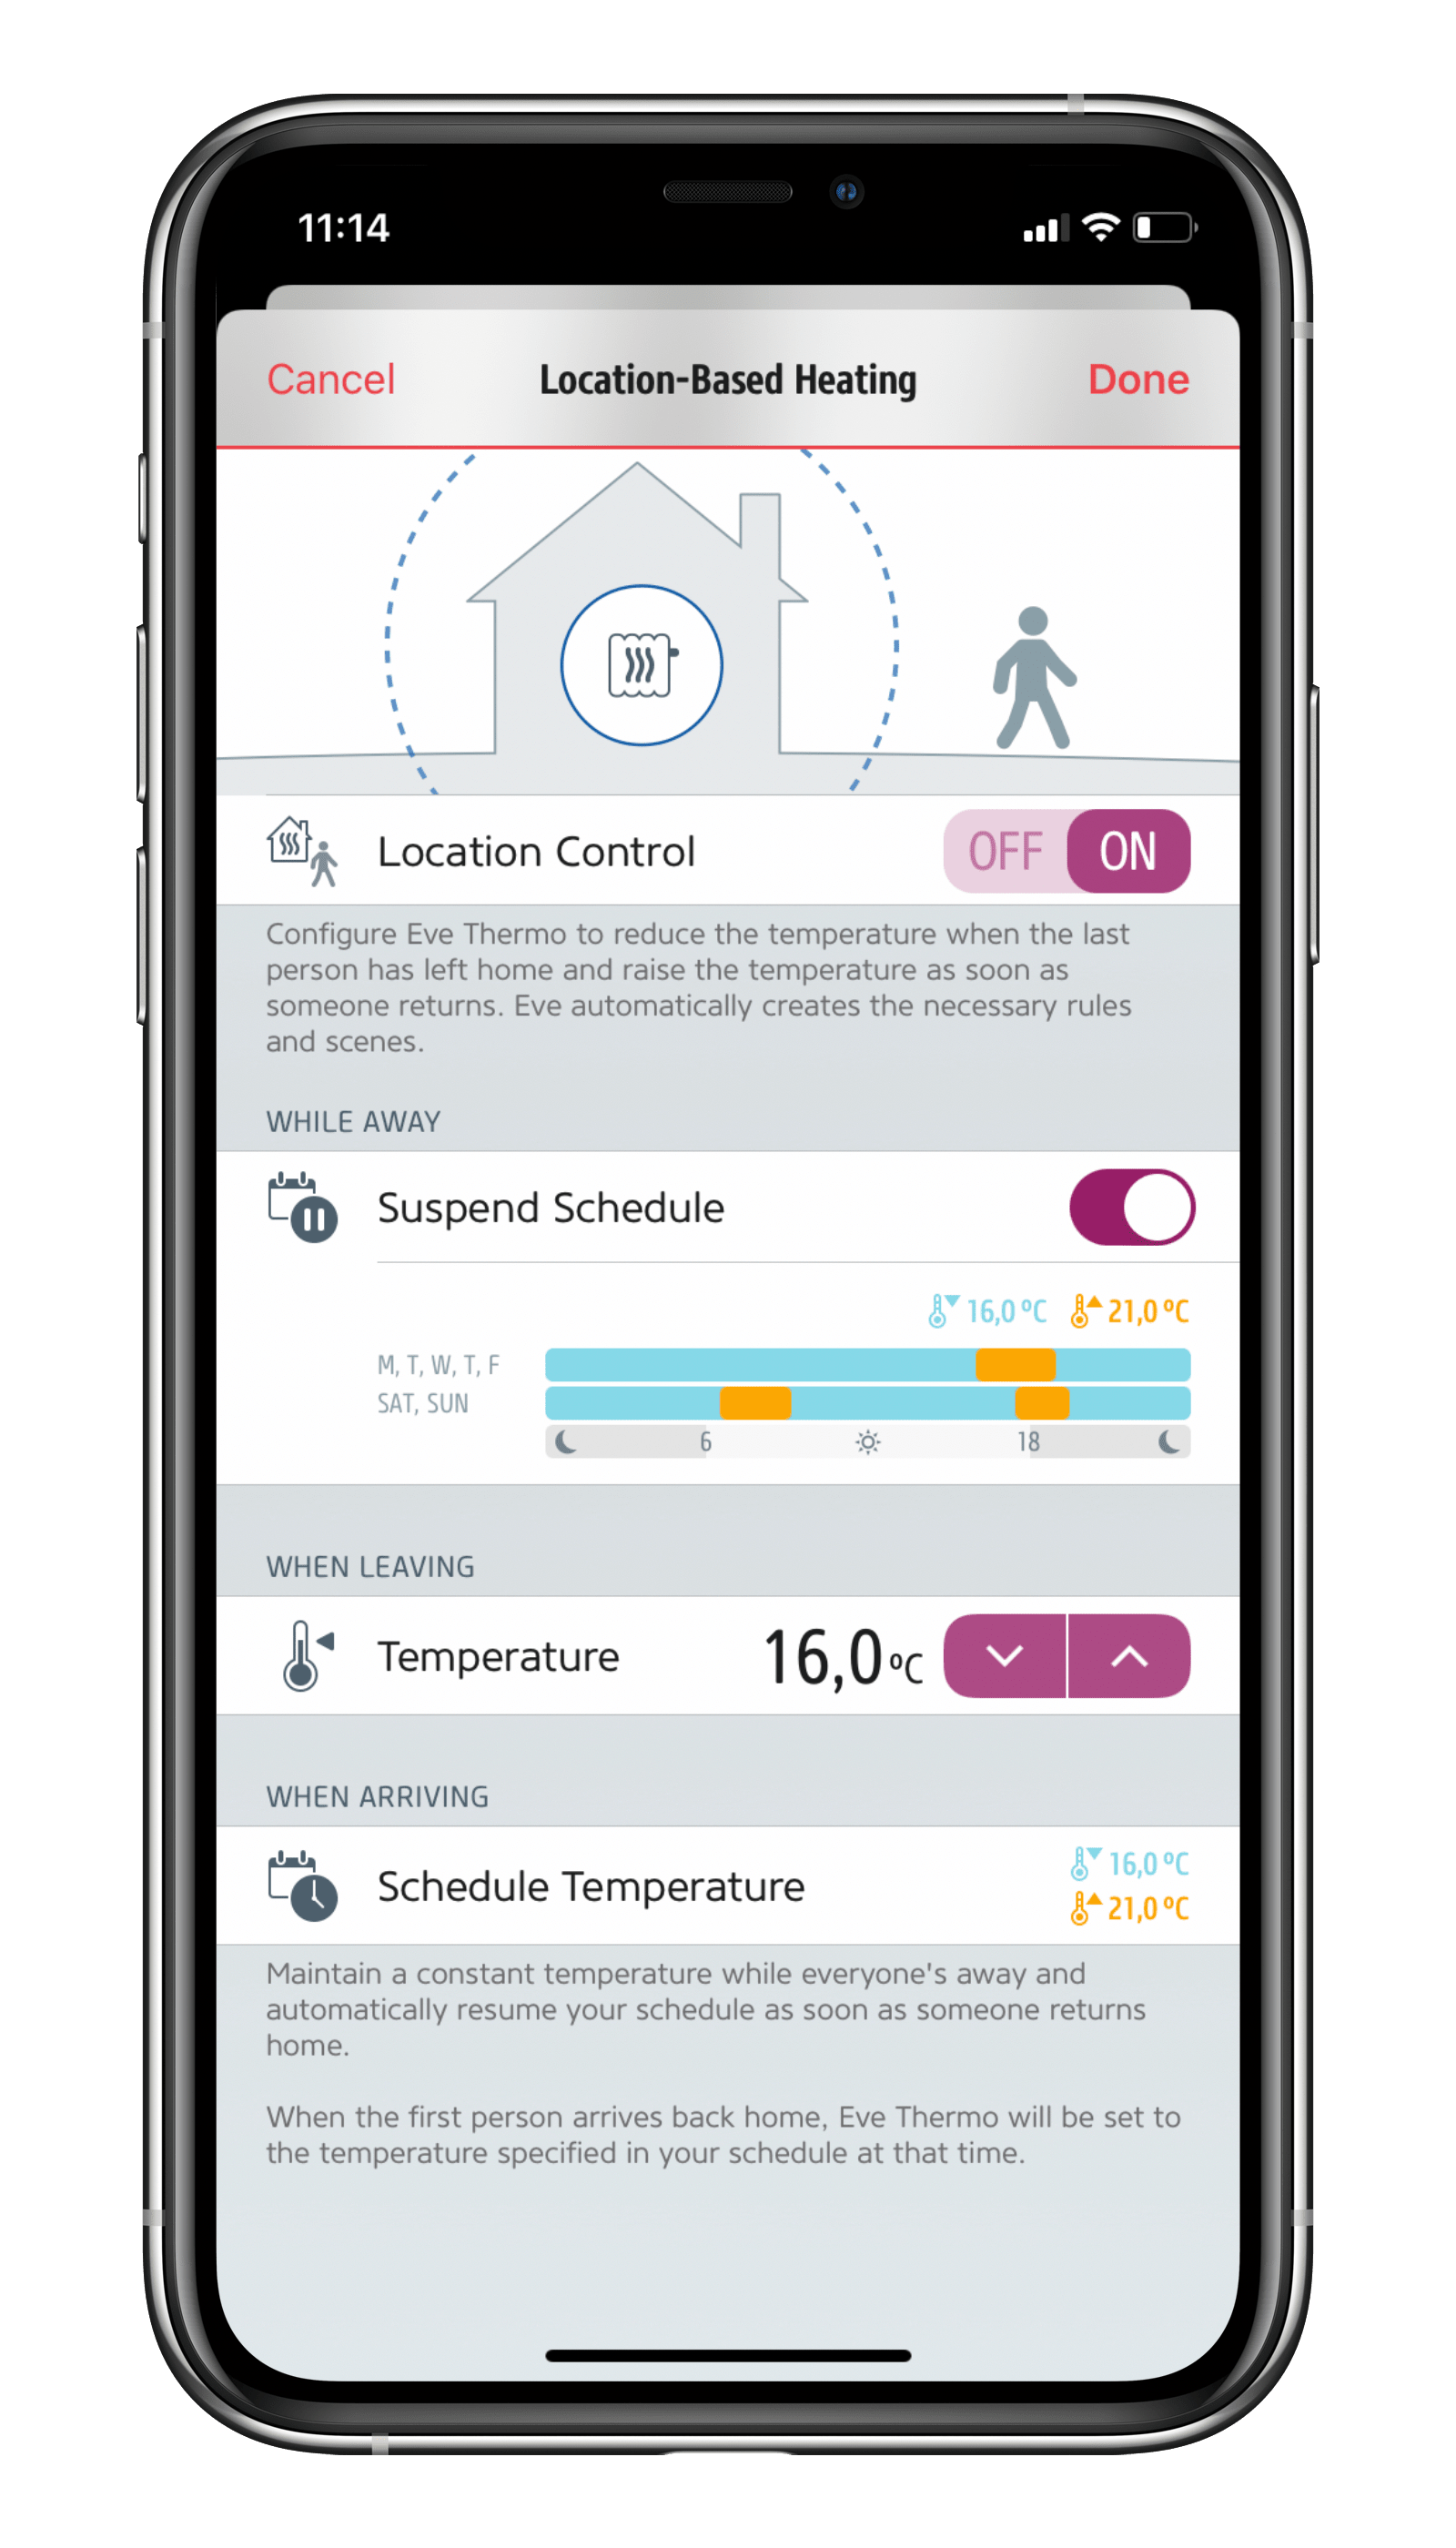
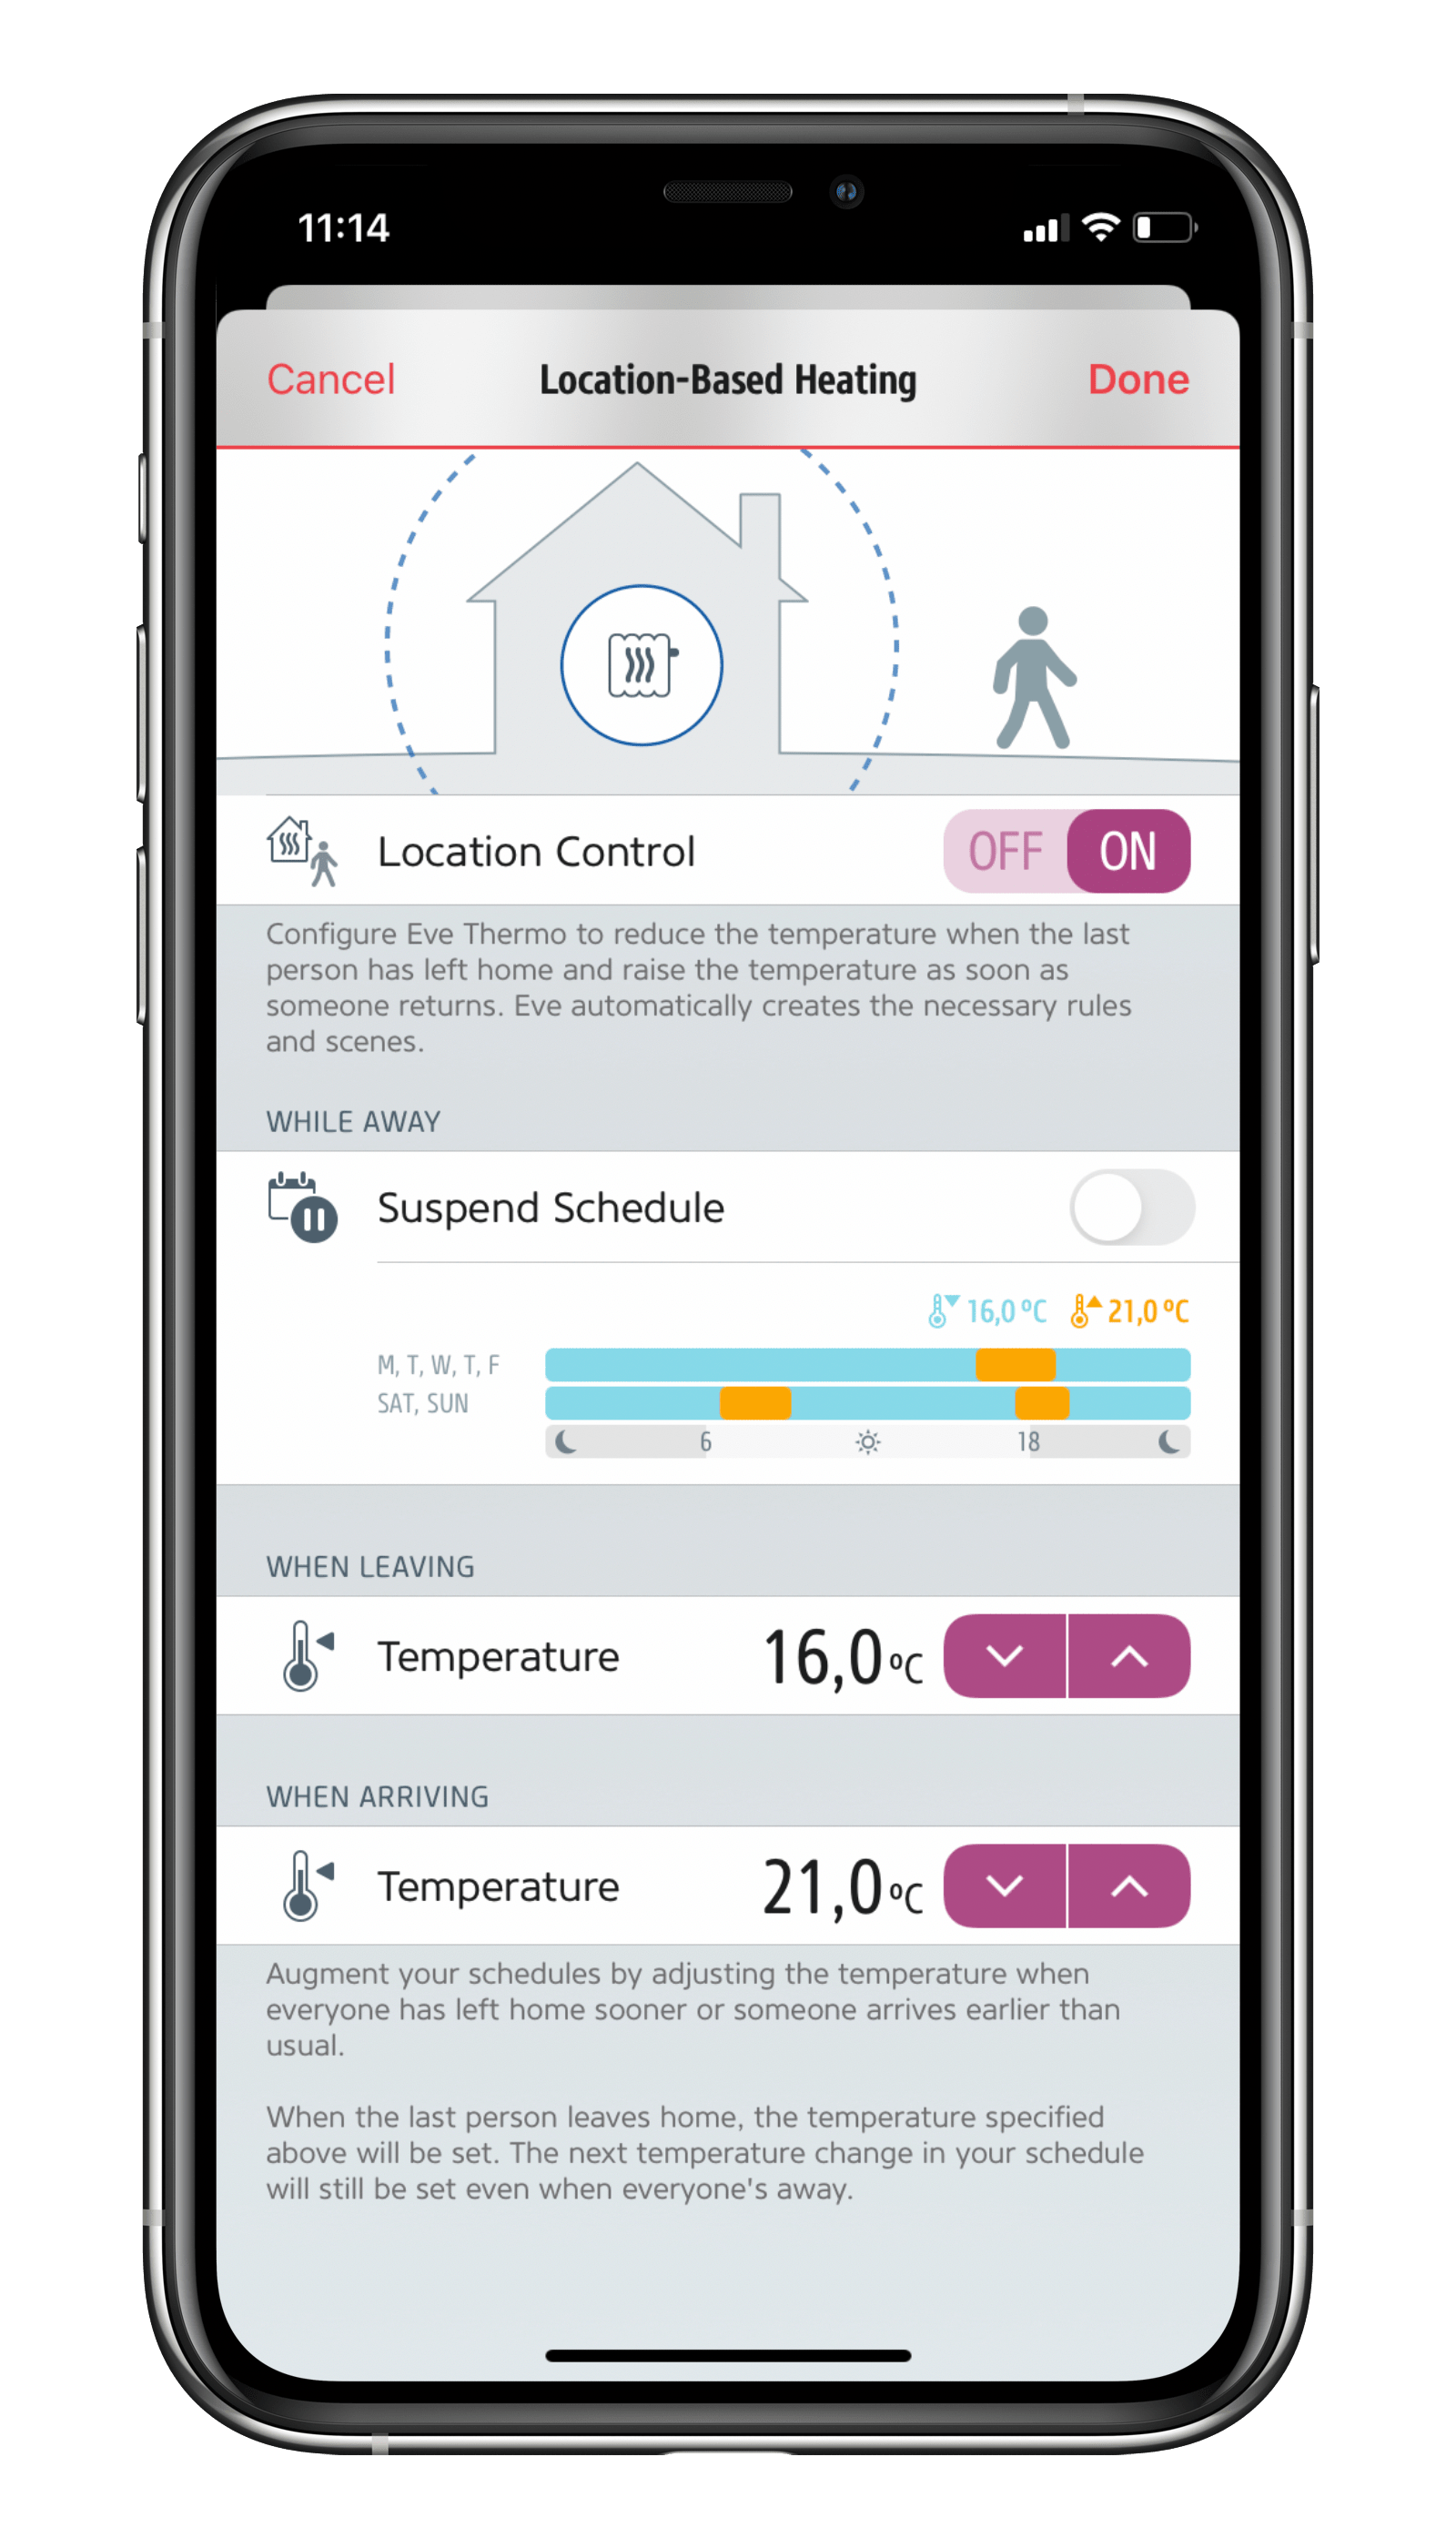
Life doesn’t always go exactly according to plan, so to cover all of life’s little eventualities you’re best off controlling your heating using a combination of schedules and location control. At all times, you remain in full control, and your privacy continues to be protected to the highest standards.
To control your heating based on location, you need a home hub (HomePod mini, HomePod or Apple TV). This enables HomeKit to determine if everyone has left home without anyone’s location constantly being tracked, recorded, or possibly even shared. Since only the technology baked into iOS is used for this function, it saves your iPhone’s battery and also ensures a profile of your movements cannot be created – not by Eve, by Apple, nor by any other unscrupulous individual who may have gotten hold of your information through a data leak. Your and your family members’ location is always determined based on the particular device set under "Find My" in the Apple ID settings.
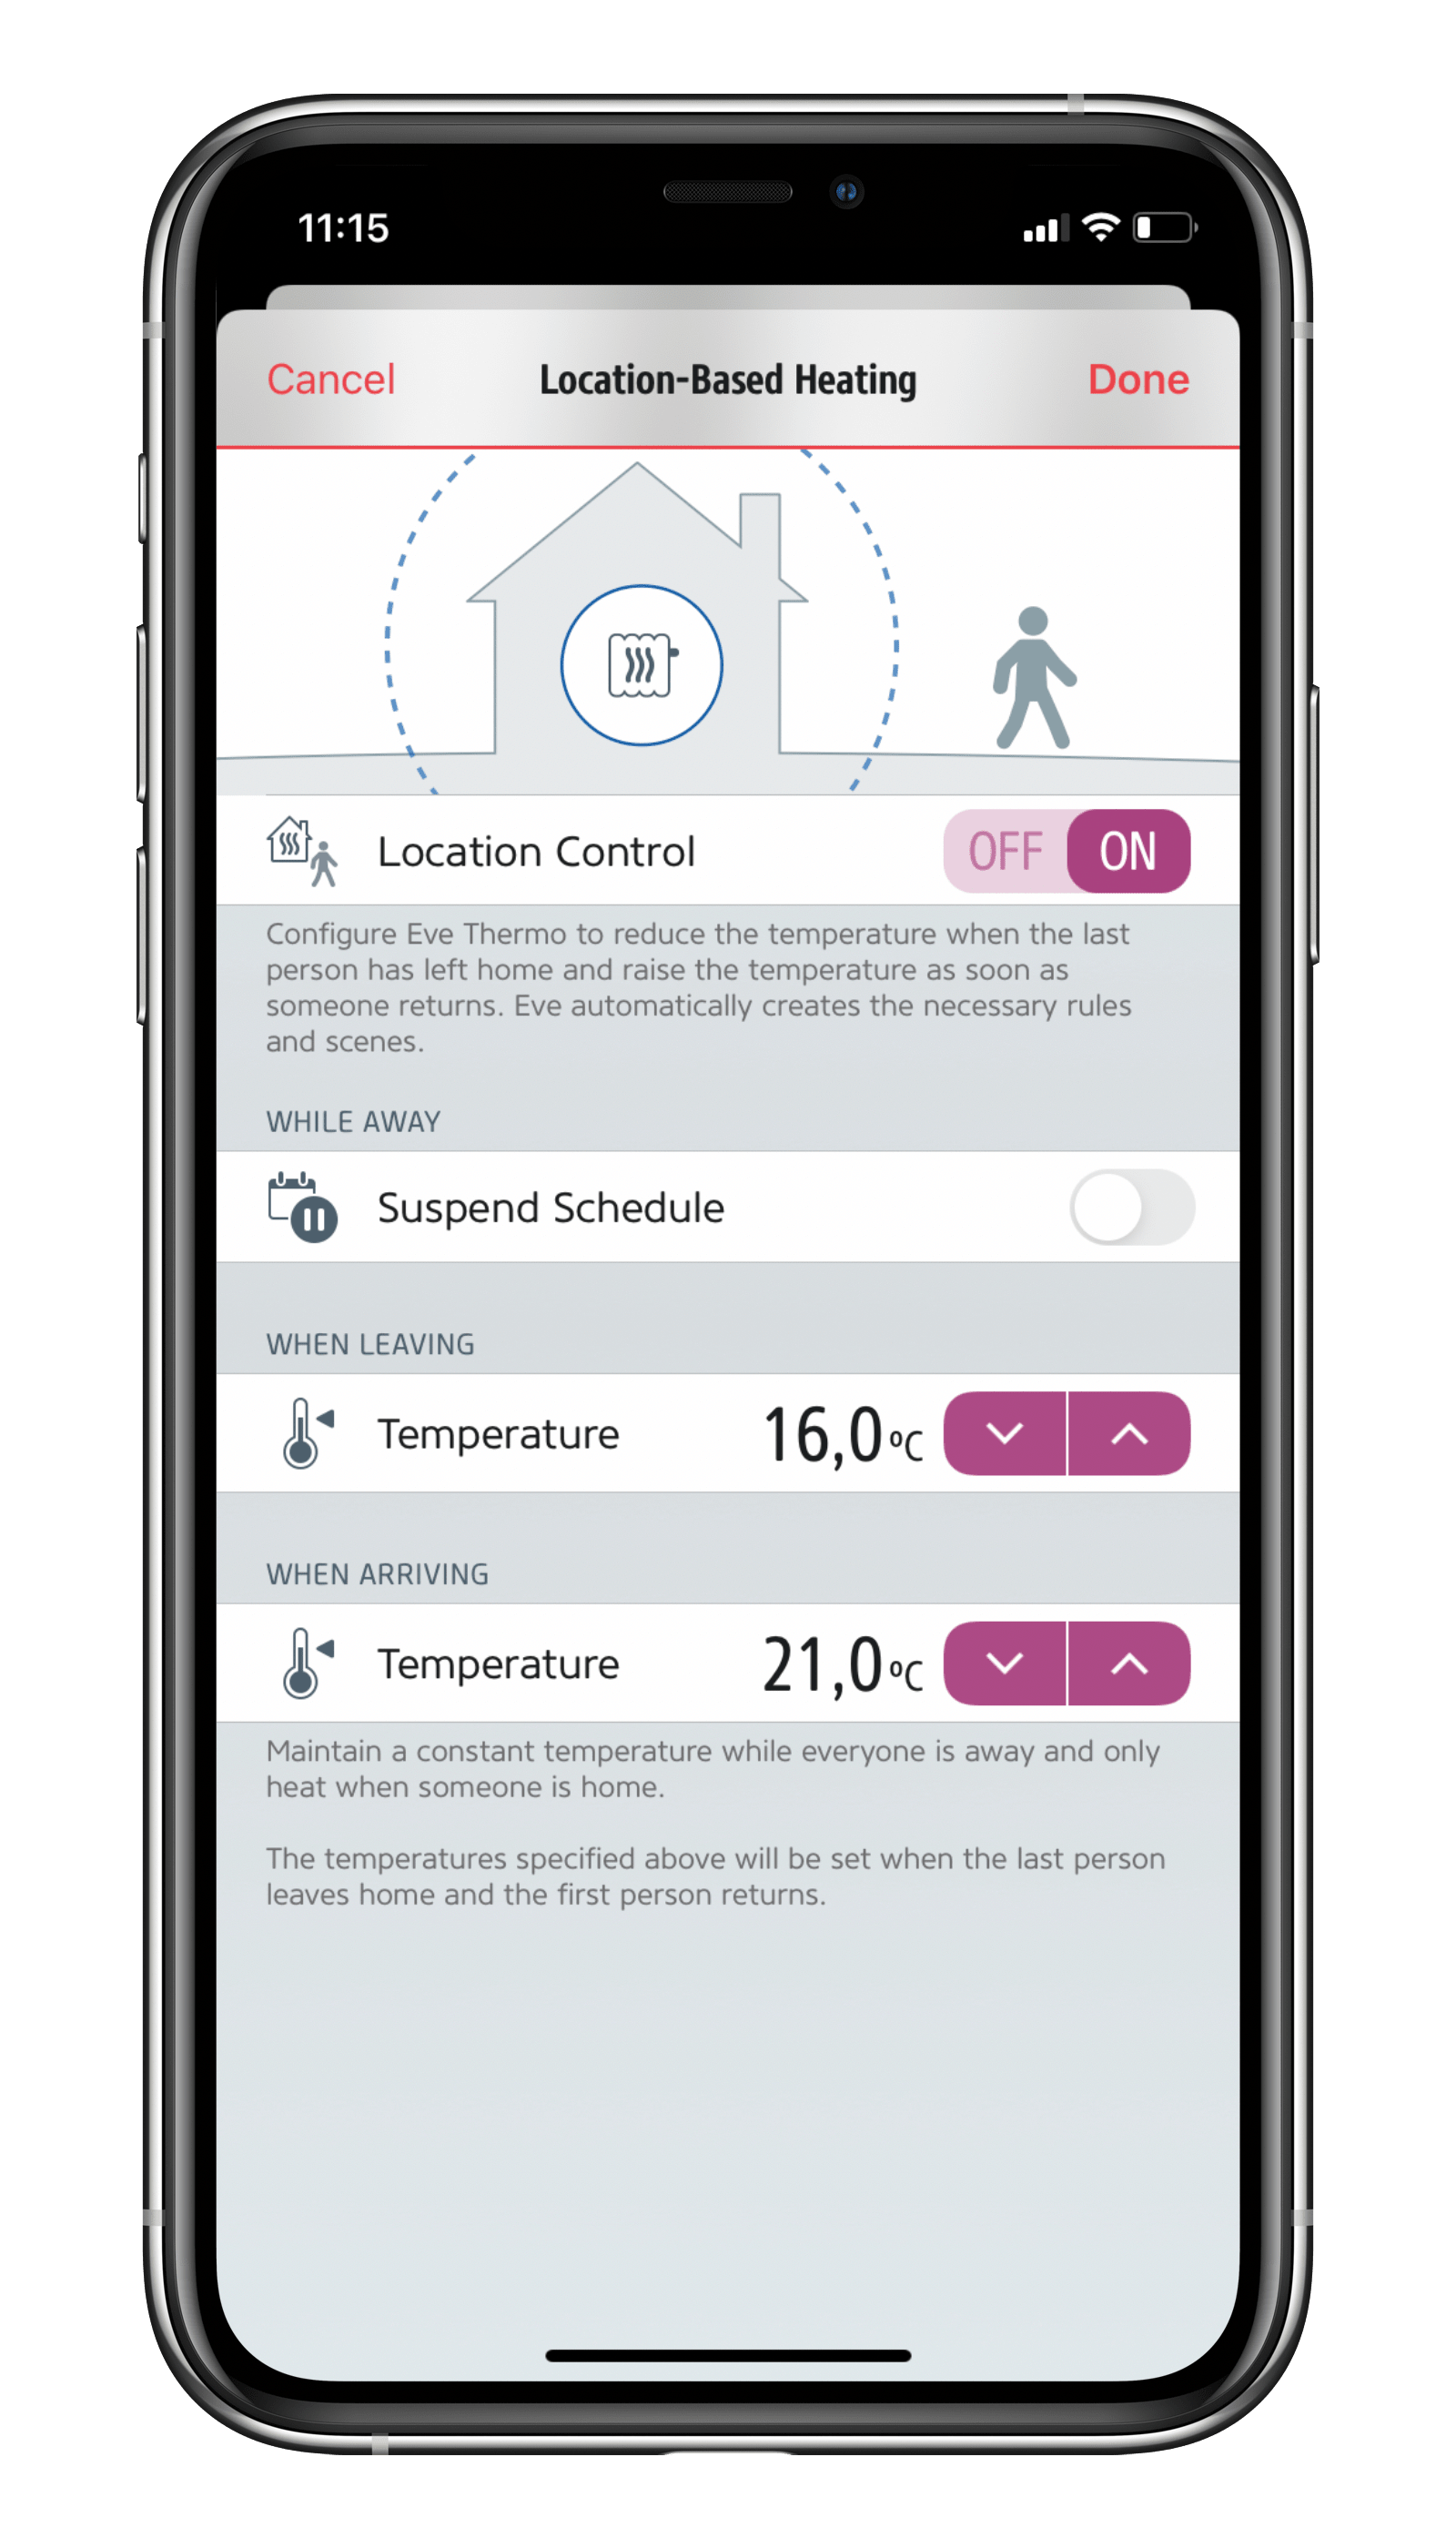
Location-based heating is a breeze to set up for Eve Thermo in the Automation area of the Eve app. Go to Rooms, choose Eve Thermo and Automation. There you can also choose whether to suspend schedules when nobody is home. You can also set the temperature you want maintained while your home is vacant.
Eve Thermo in the Eve app
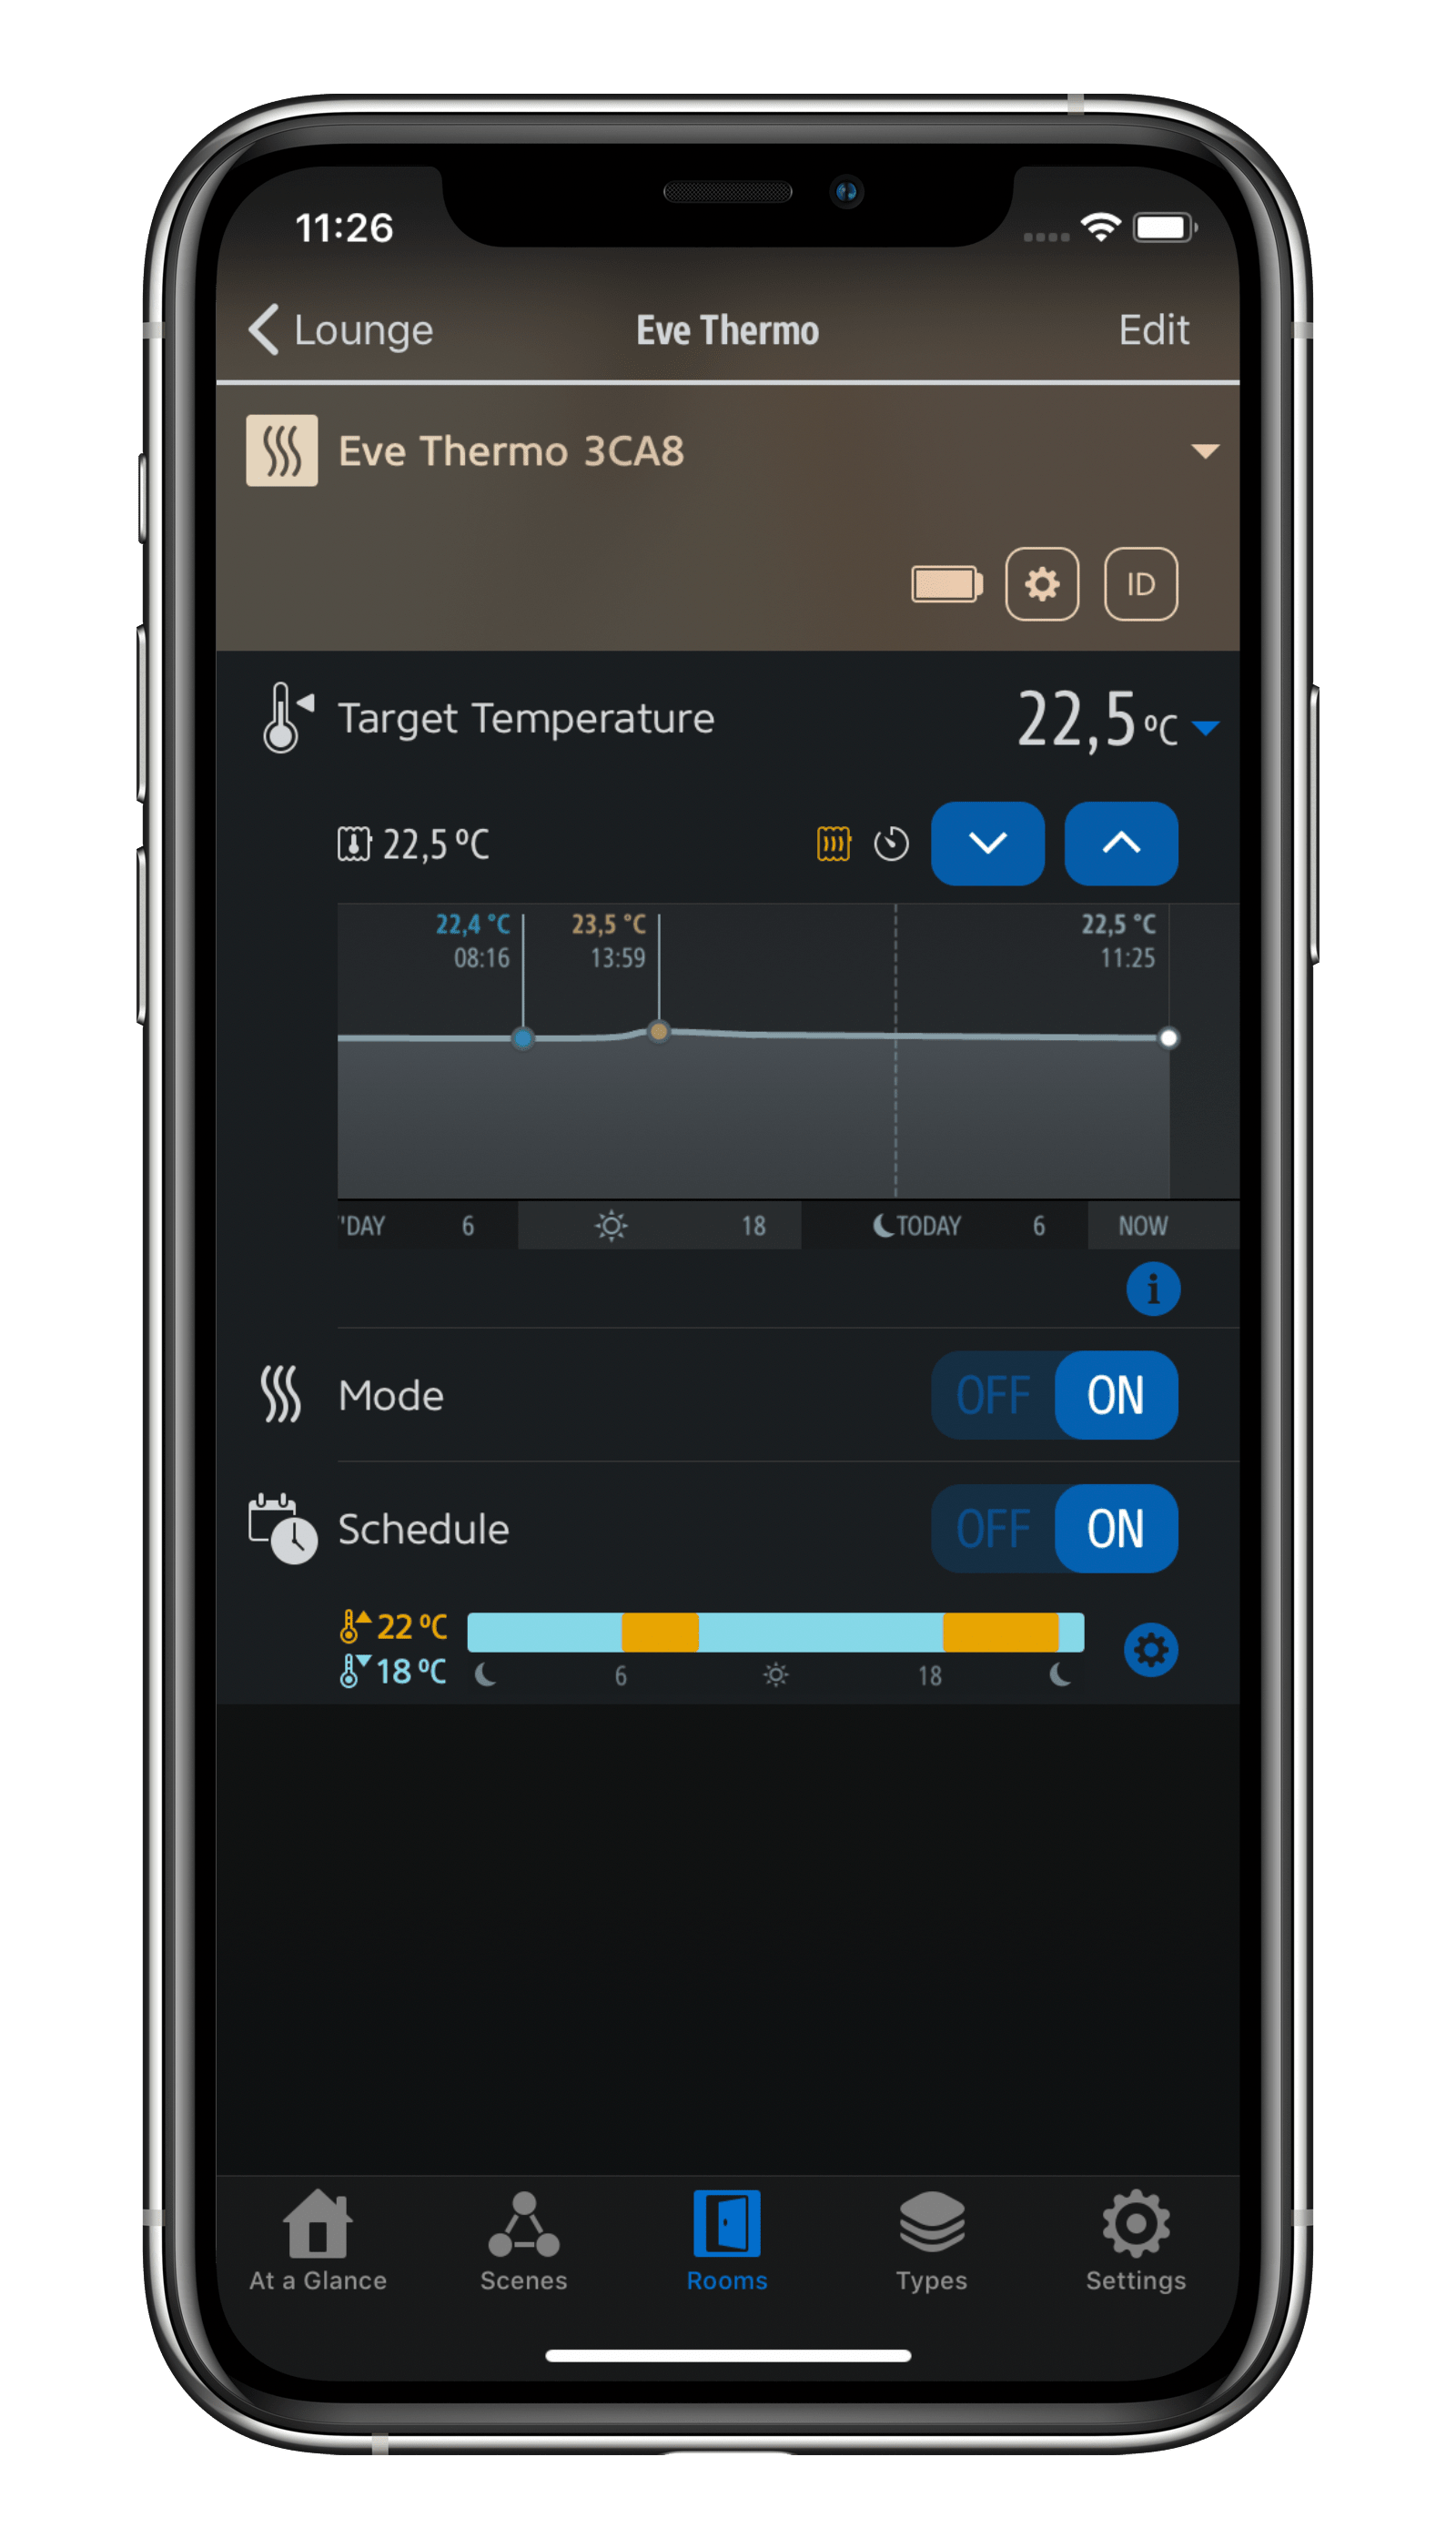
You can dive into Eve Thermo’s details view either by tapping the Rooms view in the Eve app or by long-pressing (or using 3D touch, if your device supports it) the particular accessory’s icon in the At a Glance view. Besides the accessory settings, the details view is the main dialog for controlling your smart radiator valve. It is divided into the General section, Target Temperature, Mode and Schedule.
General:
Tapping the small arrow on the right opens the advanced view, which includes a battery status indicator, an accessory settings icon and the identify button, which when tapped will display a “Hi” on the Eve Thermo in question. The latter is handy if you own several smart radiator valves and you want to make sure you’re in front of the right accessory when changing the batteries.
Target Temperature:
The central field of the detail view shows the current target temperature, which is the room temperature you want Eve Thermo to reach. Use the up/down buttons to adjust this value in 0.5 °C increments.
The measured temperature currently measured by the accessory can be seen on the left above the graph in the form of a thermometer/heater icon. HomeKit treats the sensor in question just like a stand-alone temperature sensor or that of a wall-mounted thermostat or air conditioner. Siri and the display in the Home and Eve apps display this value as measured. Any configured temperature offset (see below) is not included in the calculation by the accessory or app. Discrepancies between the actual and target temperature during heating are normal, as factors such as the sensor being located on the radiator instead of in the center of the room (and also the configured temperature offset), the 10-minute measurement interval and the smart radiator valve’s control algorithm play a role here. If, for instance, you want to heat up a room again that has cooled down, the temperature measured at the radiator’s fully-opened valve will initially be significantly higher than the target and actual room temperature – and don’t forget that the same temperature will be displayed for 10 minutes until it’s refreshed.
A yellow radiator icon will also be displayed above the graph when Eve Thermo is currently heating. You will see a stopwatch next to the target temperature button when a schedule is active (any manual setting will only last until this particular schedule is due to start again).
The graph will show a timeline with the progressions for the measured (gray) and target temperatures (blue). Daily highs and lows as well as the last measured temperature will be marked with dots. Tapping the small info icon will allow you to view the graph by hour, week or month. Additionally, you can stop the target temperature from being displayed in the graph, deactivate Graph Line Smoothing and access temperature readings in the list view.
Mode:
The Mode section lets you disable Eve Thermo’s heating function. The mode returns to On if you enter anything via the accessory’s touch controls or use Siri, automations or the Home app to trigger changes. However, please note that even when in the Off mode, valve descaling cycles, and a certain amount of noise in connection with that, will continue. The temperature will also continue to be measured. If radiator valves are grouped, switching off one accessory will not affect the others.
Schedule:
The current schedule stored on the accessory is displayed in the bottom-most section. It can be deactivated permanently via the On/Off button – and will stay deactivated even after the next heating phase is reached. Tapping the gear icon will take you to the schedule section with the schedules contained in the Eve app and those added by you. You’ll find an info icon next to the latter, which you can tap to bring up the schedule editor.
Settings
You’ll find all the key functions, some of which you’ll have already seen during the initial setup, in the settings for Eve Thermo (Eve > Settings > [Room] > [Eve Thermo]). Starting from the top.
Room: This is where you’ll find the room you assigned your Eve Thermo to during installation. You can change it at any time.
Name: This is the Siri name you set during the initial setup. Although entirely optional, a meaningful Siri name such as “Living Room Heating” can make controlling Eve Thermo with your voice a lot easier.
Installation: Here you can see if Eve Thermo has been installed correctly (OK). If you want to use your accessory on a different radiator in your home, but want to keep the data, tap Installation > Remove. You can now remove Eve Thermo and calibrate it at its new location. If you ended up installing the display upside down, you can change its orientation here.
Temperature Offset: As Eve Thermo connects right next to the radiator, which is often located under a windowsill, the values measured may deviate from the actual temperature in the center of the room. To compensate, you can configure a temperature offset which Eve Thermo factors in when controlling the valve. If the room temperature is lower than the measured temperature shown in the app, set the temperature offset to a negative value. For example, if your lounge is 20 °C, but Eve Thermo reports 21.5 °C, set the temperature offset to -1.5 °C. Over time, you’ll need to work towards finding the ideal temperature offset that works for the particular room.
Window Detection: If you use Eve Door & Window on a window in the room where you’re also using Eve Thermo, Eve can automatically stop heating if the window is opened for ventilation purposes. It then resumes heating once the window is shut. This type of automation requires Apple TV or a HomePod as a home hub.
Window Detection is smart: If you forget to shut the window, heating resumes automatically after 30 minutes to prevent the building from cooling down. However, you can adjust this value to suit.
Eve Thermo detects rapid drops in temperature even without a wireless contact sensor, however it’s less precise than when used in conjunction with Eve Door & Window. In this mode Eve Thermo continues to heat again after 10 minutes.
Vacation Mode: About to take a long vacation? To avoid having to adjust each radiator individually or add a different schedule, you can simply activate Vacation Mode. It’ll suspend your schedules, hold the energy-saving temperature you’ve set and prevent your home from freezing up. Here you can set whether the Eve Thermo in question should be part of the vacation scene and the temperature you want maintained. Once you’re back from vacation, simply activate the Back from Vacation scene and everything will return to normal. .
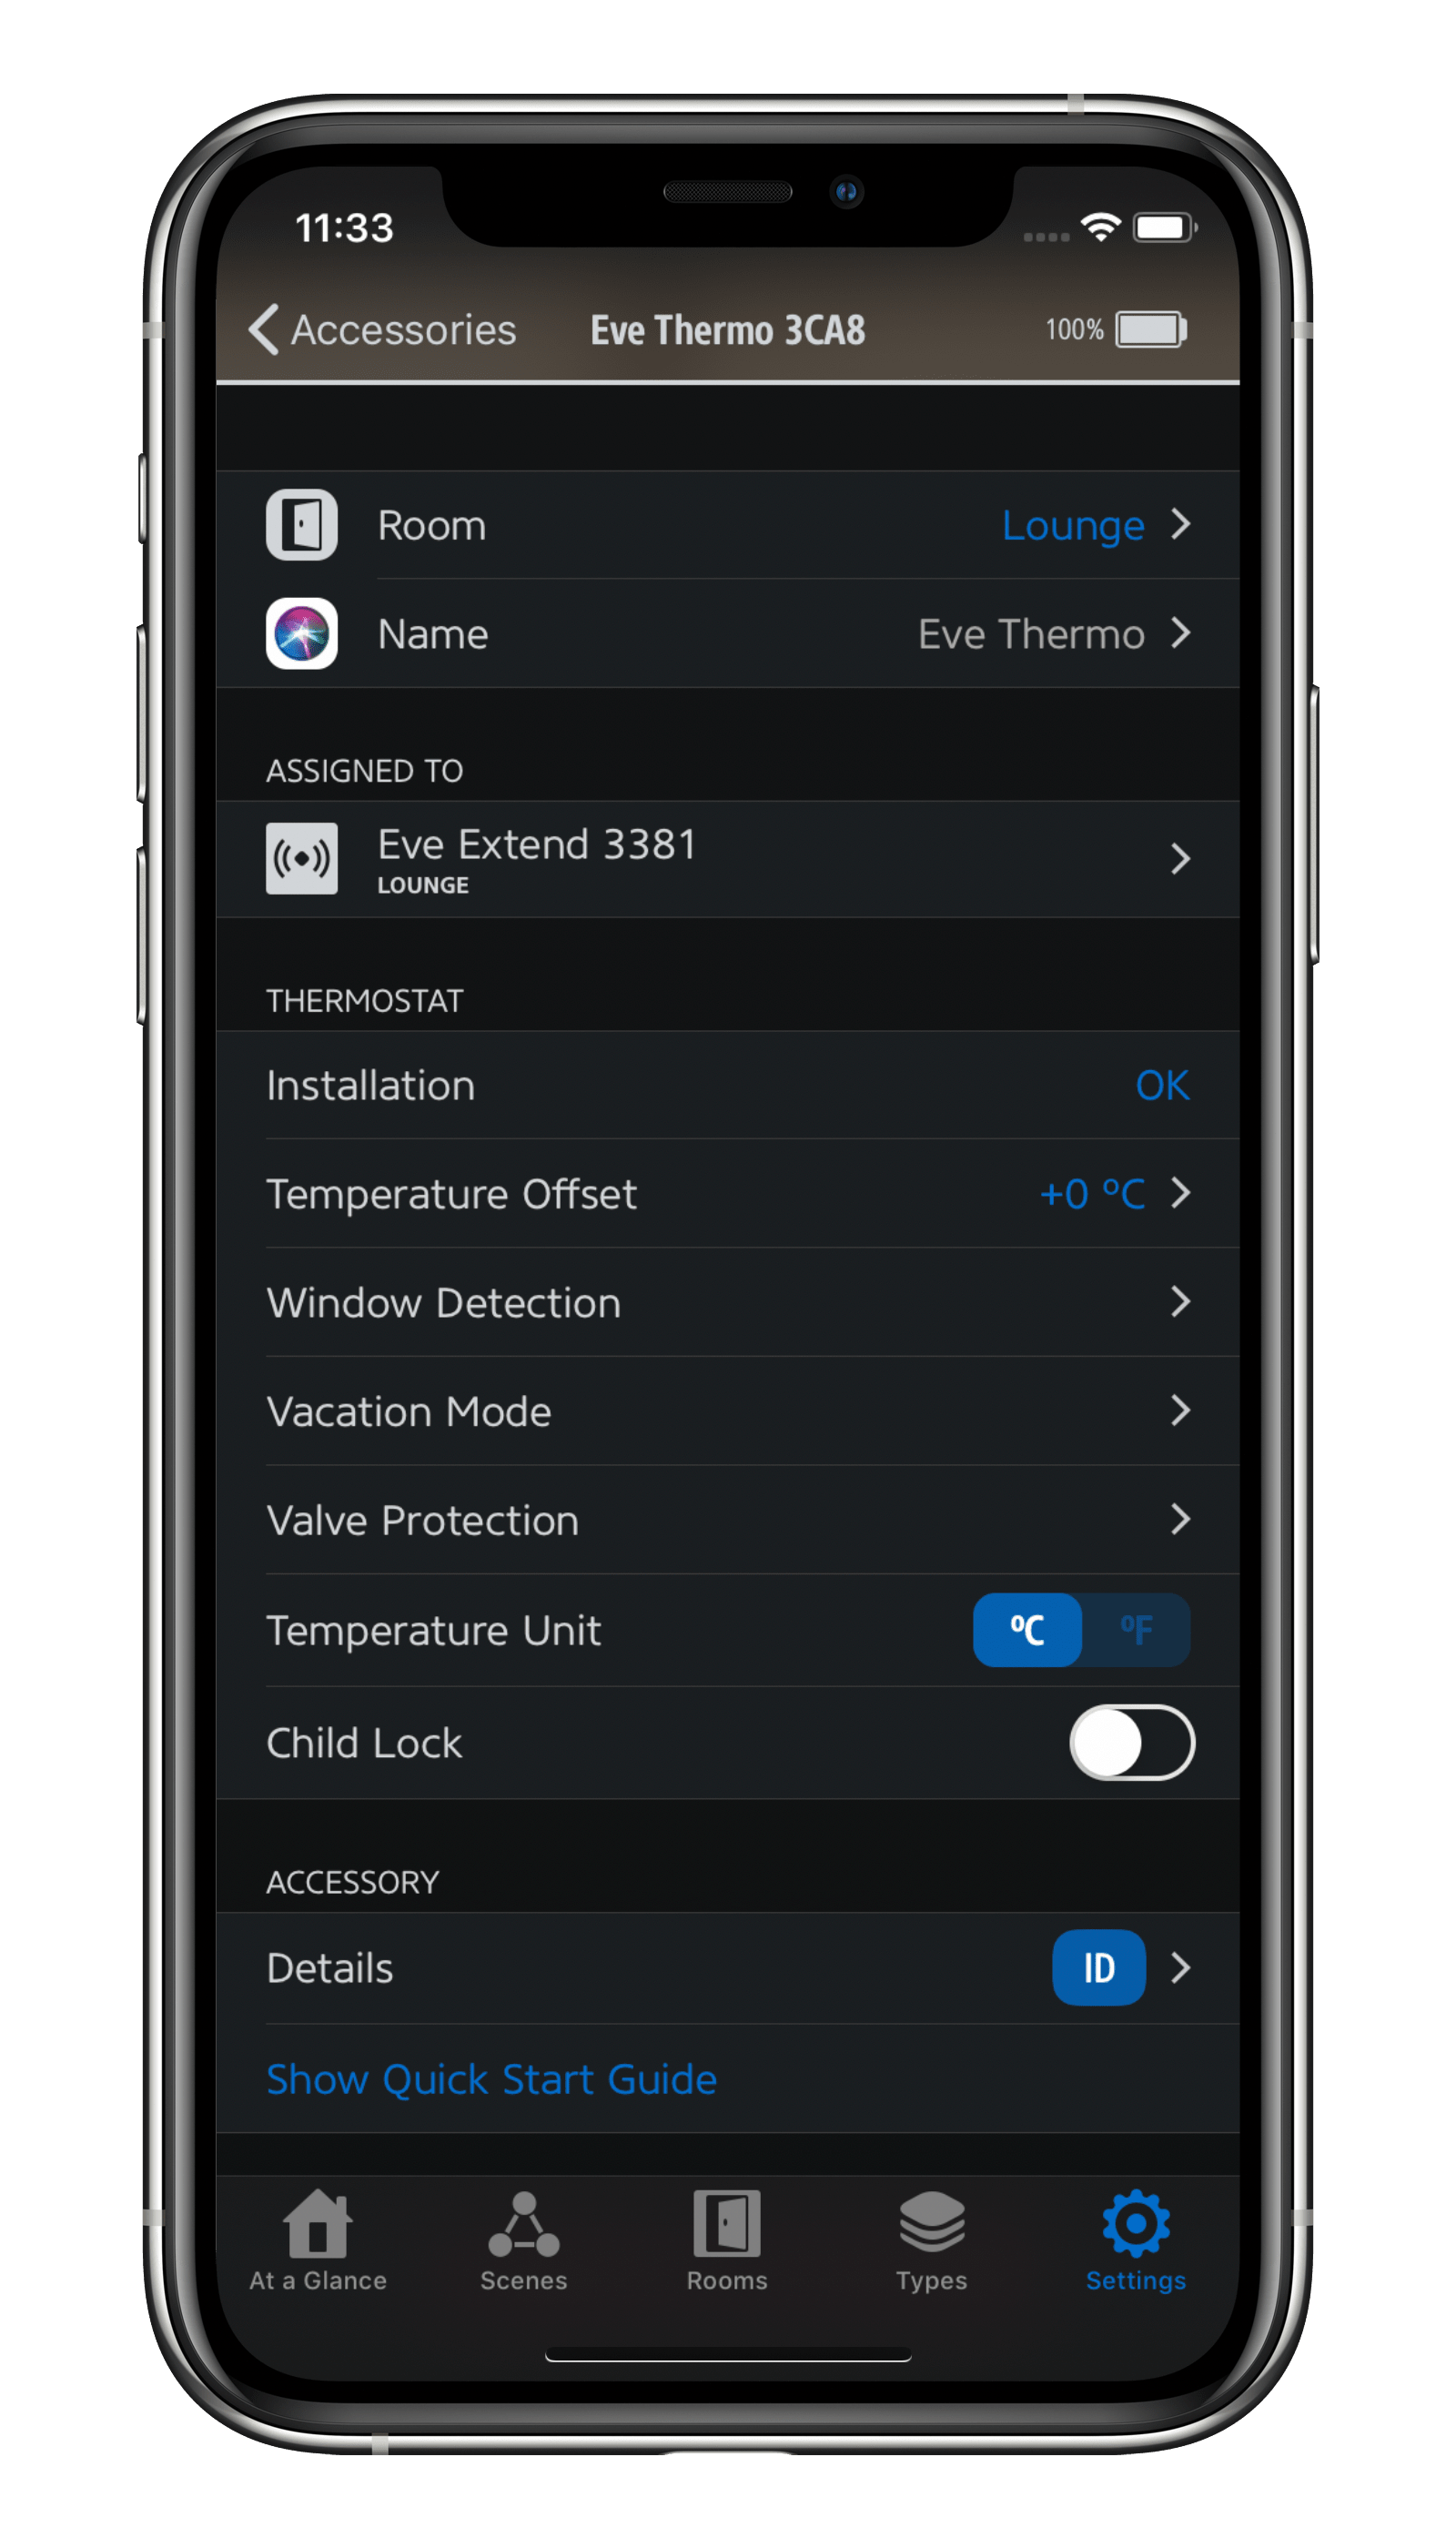
Valve Protection: Eve Thermo will open the valve fully every three weeks to prevent scale buildup. If you trigger this function manually, Eve Thermo will remember when you did so and resume automatic valve protection three weeks from that time of the day.
Temperature Unit: Choose between Celsius and Fahrenheit.
Child Lock: To prevent unwanted temperature adjustments, activate Child Lock to disable the touch controls of Eve Thermo.
ID: Tapping ID will display Hi on the Eve Thermo in question. It’s really handy if you want to identify a particular Eve Thermo accessory.
Remove Accessory: This command lets you remove a particular Eve Thermo accessory from your HomeKit configuration. You may want to do this if you intend to relocate your accessory to a different home.
Assigned to (optional): If you have assigned Eve Thermo to an Eve Extend range extender, it will also appear here in the settings.
No bridge or starter set required.
Eve Thermo works right out of the box, eliminating the need for additional accessories. Schedules are stored directly on the accessory itself, so they’re always executed without the involvement of any other devices. For automations (such as heating based on if you’re at home or away, or window detection in conjunction with Eve Door & Window), you’ll need a HomePod, HomePod mini or Apple TV as a home hub.
Increase the reach of your devices
With a HomePod mini or the new Apple TV 4K in your home, your latest-generation Thread-enabled Eve Thermo can communicate over the Thread mesh network, reaching even the farthest corners of your abode. This happens automatically without you needing to configure anything. A Full Thread Device, such as Eve Energy, Eve Light Switch or Eve Water Guard, can act as a router node and relay data packets from other Thread products, such as Eve Thermo.
To view the structure of your Thread network and see where you can make improvements, simply go to the Settings area of the Eve app and tap Thread Network. Among other things, you’ll be able to tell which nodes your Thread devices use to communicate and whether you can further improve the stability and reach of your network and devices by adding one more Full Thread Device or moving one to a better location.
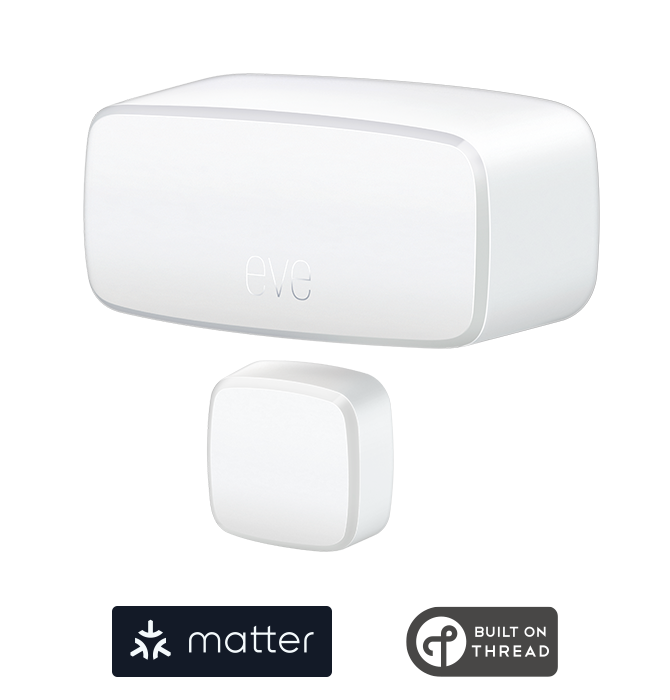
Requires iOS/iPadOS 16.4 (or later) / Android™ 8.1 (or later), Matter controller / Thread Border Router
Posts you might also be interested in.
Schedules & location control: Smart heating with Eve Thermo
Enjoy a cozy home when you’re there, and save energy when you’re not – that's smart heating, courtesy of Eve Thermo. Now it’s easier than ever to combine the sheer convenience of schedules with location-based heating. Read on to learn how to enjoy all these great benefits.
Eve Thermo receives Ecodesign Award
On November 25, 2019, Eve Systems received the Ecodesign Award, Germany’s most renowned award for ecological design, at an awards ceremony held at the German Federal Ministry for the Environment, Nature Conservation and Nuclear Safety.
Even penguins enjoy keeping cozy thanks to smart heating in the kindergarten
A parent-run initiative like ours consumes a great deal of time and effort, plus we need to keep a constant eye on our operating costs. However, as we don’t just want to save money, but also lighten the load on our staff and the environment, we’ve recently started using smart radiator valves to intelligently control the indoor temperature. In this post we share the lessons we’ve learned.




- Reply
HiI'm interested in the Eve thermo, I have two questions about the possibilities of the products.
I have an underfloor heating in the living room and kitchen (one big room) with 3 heating loops.
1. Is it possible to have 3 valves controlling the heating in the same room?
2. Is it possible to use Eve room as a thermostat to control the valves?
Best regards,
Ragnar
- Reply
Hello Ragnar!Eve Thermo does not support underfloor heating and relies on setting the Offset in the app Eve what makes no sense on underfloor heatings.
Using an Eve Room (2018) makes no sense as well, because the Offset would have to be set anyway.
Sorry, but Eve Thermo just does not meet your heating system.
Best regards, volker
- Reply
Volker, what does “Off” mode for Thermo mean: radiator valve closed or open?I have a centralized heating in house and during summer it is turned off, so actually better to keep valves open.
If “Off” mode is closed, does Thermo still runs periodic open/close cycles?
- Reply
Hi Mark!Setting the mode to Off closes the valve. I usually do this in spring when no more heating is needed. Along with setting Schedule to Off and disable the Window Detection. Turning all On again in Autumn, when it's getting colder.
The cycles for valve protection are done.
Best regards, volker
- Reply
Hello!Can the Thermos be used with Eve Window only or any HomeKit compatible device will do, for example Aqara Windows sensor?
- Reply
Hello Mark!If you talk about the function/rule/automation Window Detection this is only available for Eve Thermo users with Ev accessories like Eve Door & Window and Eve Window Guard.
You may though create a rule in Eve or Home that does pretty much the same when using a HomeKit enabled contact sensor from other brands.
Best regards, volker
- Reply
Thank you for the reply!Down the same road: I assume that only proprietary temperature sensor can be used to Auto-calibrate room temperature, but the same can be achieved with any sensor using Eve scenarios?
- Reply
Hello Mark!No external sensor needed at all. Just adjust the Offset and you are good.
Best regards, volker
- Reply
I was thinking how the offset works and have a doubt that it is overly correct.For example, I have radiator in a niche covered by decorative screen. In my case working/open radiator would translate in a pretty large temp offset, while closed radiator can in a while has zero offset.
So I am considering feeding Thermo data from external sensor.
- Reply
Hello Mark!Using an external trigger does not work well at all.
I would try the following first. Set the Offset to 0 degrees then the Eve Thermo to 23 degrees. Wait for 2-3 hours and measure the temperature in the middle of the room with a thermometer. Would ist be 19,5 degrees, set the offset to -3,5 degrees. I would give it a try. Best regards, volker
- Reply
Ok, but is it possible to connect an external thermometer as the source measuring device? I have a large room with two radiators and depending on the outside weather the same offset may work or not...- Reply
Hello Guido! No, this is not possible. HomeKit enabled accessories are not allowed to talk to each other.Best regards, Volker
- Reply
Hello, I'm interested in your system. However, having a gas boiler, how is it possible to control its operation without any smart thermostat connected to the boiler. This way, I can only control the radiator valve, but I cannot make the boiler turn on automatically.Best regards
- Reply
Hello Rui!For Eve Thermo hot water for heating has to be available at all time. It does not at all control the boiler at all. The boiler har to be on all the time in the heating period.
Best regards, Volker
- Reply
Hello, we have cooling through the floor heating. Can I set the valves in a cooling mode to be fully open in the summer? Or can I do a workaround and set them on a value above 30°C so that the would be open all Summer?- Reply
Hello Simon!Sorry, but this won't work at all. Eve Thermo relies on a heater and always hot water available.
Best regards, volker
- Reply
Very happy with my 6 eve thermos installed. Combined with 2 Apple TV’s and an eve extend this works perfectly.Question: in summer is it better to switch the thermos to ‘mode off’? Or keep them on ‘mode on’ and set the thermos to a low temperature? What’s the advantage of turning them off, energy saving for the batteries?
- Reply
Hello Richard!I set all my Eve Thermos in summer for Mode and Schedule to Off and make sure, there is no automation running that might turn the Eve Thermos on like "When arriving turn on lights and Eve Thermos".
The frost protection at 10 degrees is always active, can't even be deactivated.
Best regards, stay safe, Volker
- Reply
Thanks Volker for the quick reply.But I could also set the Thermos to 15 degrees celsius and with higher temperatures in my house during summer the valves would also stay closed. Is there a specific reason why you turn them off in summer?
- Reply
Hello Richard!Of cause you can. The valves would not open unless the temperature in the room falls below 15 degrees. I turned it off during summer cause the boiler is on always and the temperature does never fall below 20 degrees in summer. It not a difference from the time when we had only manual thermostats. In summer I set all to just do the frost protection. This is even active when turning off Eve Thermo, the frost protection turns on once temperature falls below 10 degrees. This can't be turned off, it is one of the basic functions of Eve Thermo, build in.
Best regards, volker